
Care and Maintenance Videos
Getting to know your home
Care and Maintenance Videos
Getting to know your home
Watch the following videos to ensure proper care and maintenance for your home.
HOME SUPPORT TOOLS
HOME SUPPORT TOOLS
Quick & Easy access to common homeowner care and maintenance tips.
At the beginning: Getting to know your home.
Q. We have just moved into our new North Prairie home, how do we become familiar with all the equipment in our new home, where everything is and how to operate and maintain it?
A. From our experience we find that with the excitement of moving to a new home, the stress involved and so many things to think about and organize; it is very hard to remember all the information given at the walkthrough.
For this reason; we have put together a short introduction walk through web clip that you can watch after the unpacking is done and you have settled into your new home – possibly in your favourite chair with a mug of coffee!
Basements
Q. There is frost building up in the corners of our basement walls, what should I do?
A. Frost buildup on undeveloped basement walls when temperatures are -10 and below is considered normal as you have hot air meeting cold from outside. There will usually be more of a buildup in the corners of the room because it is hard for air to circulate into these corners. This concern can be minimized by running your furnace fan on constant, running a portable fan in the area or by adding a dehumidifier to the area. The frost is nothing to worry about and will disappear when you finish and insulate your basement walls.
In the same way; there may be a buildup of condensation and moisture in the corners in the warmer summer weather.
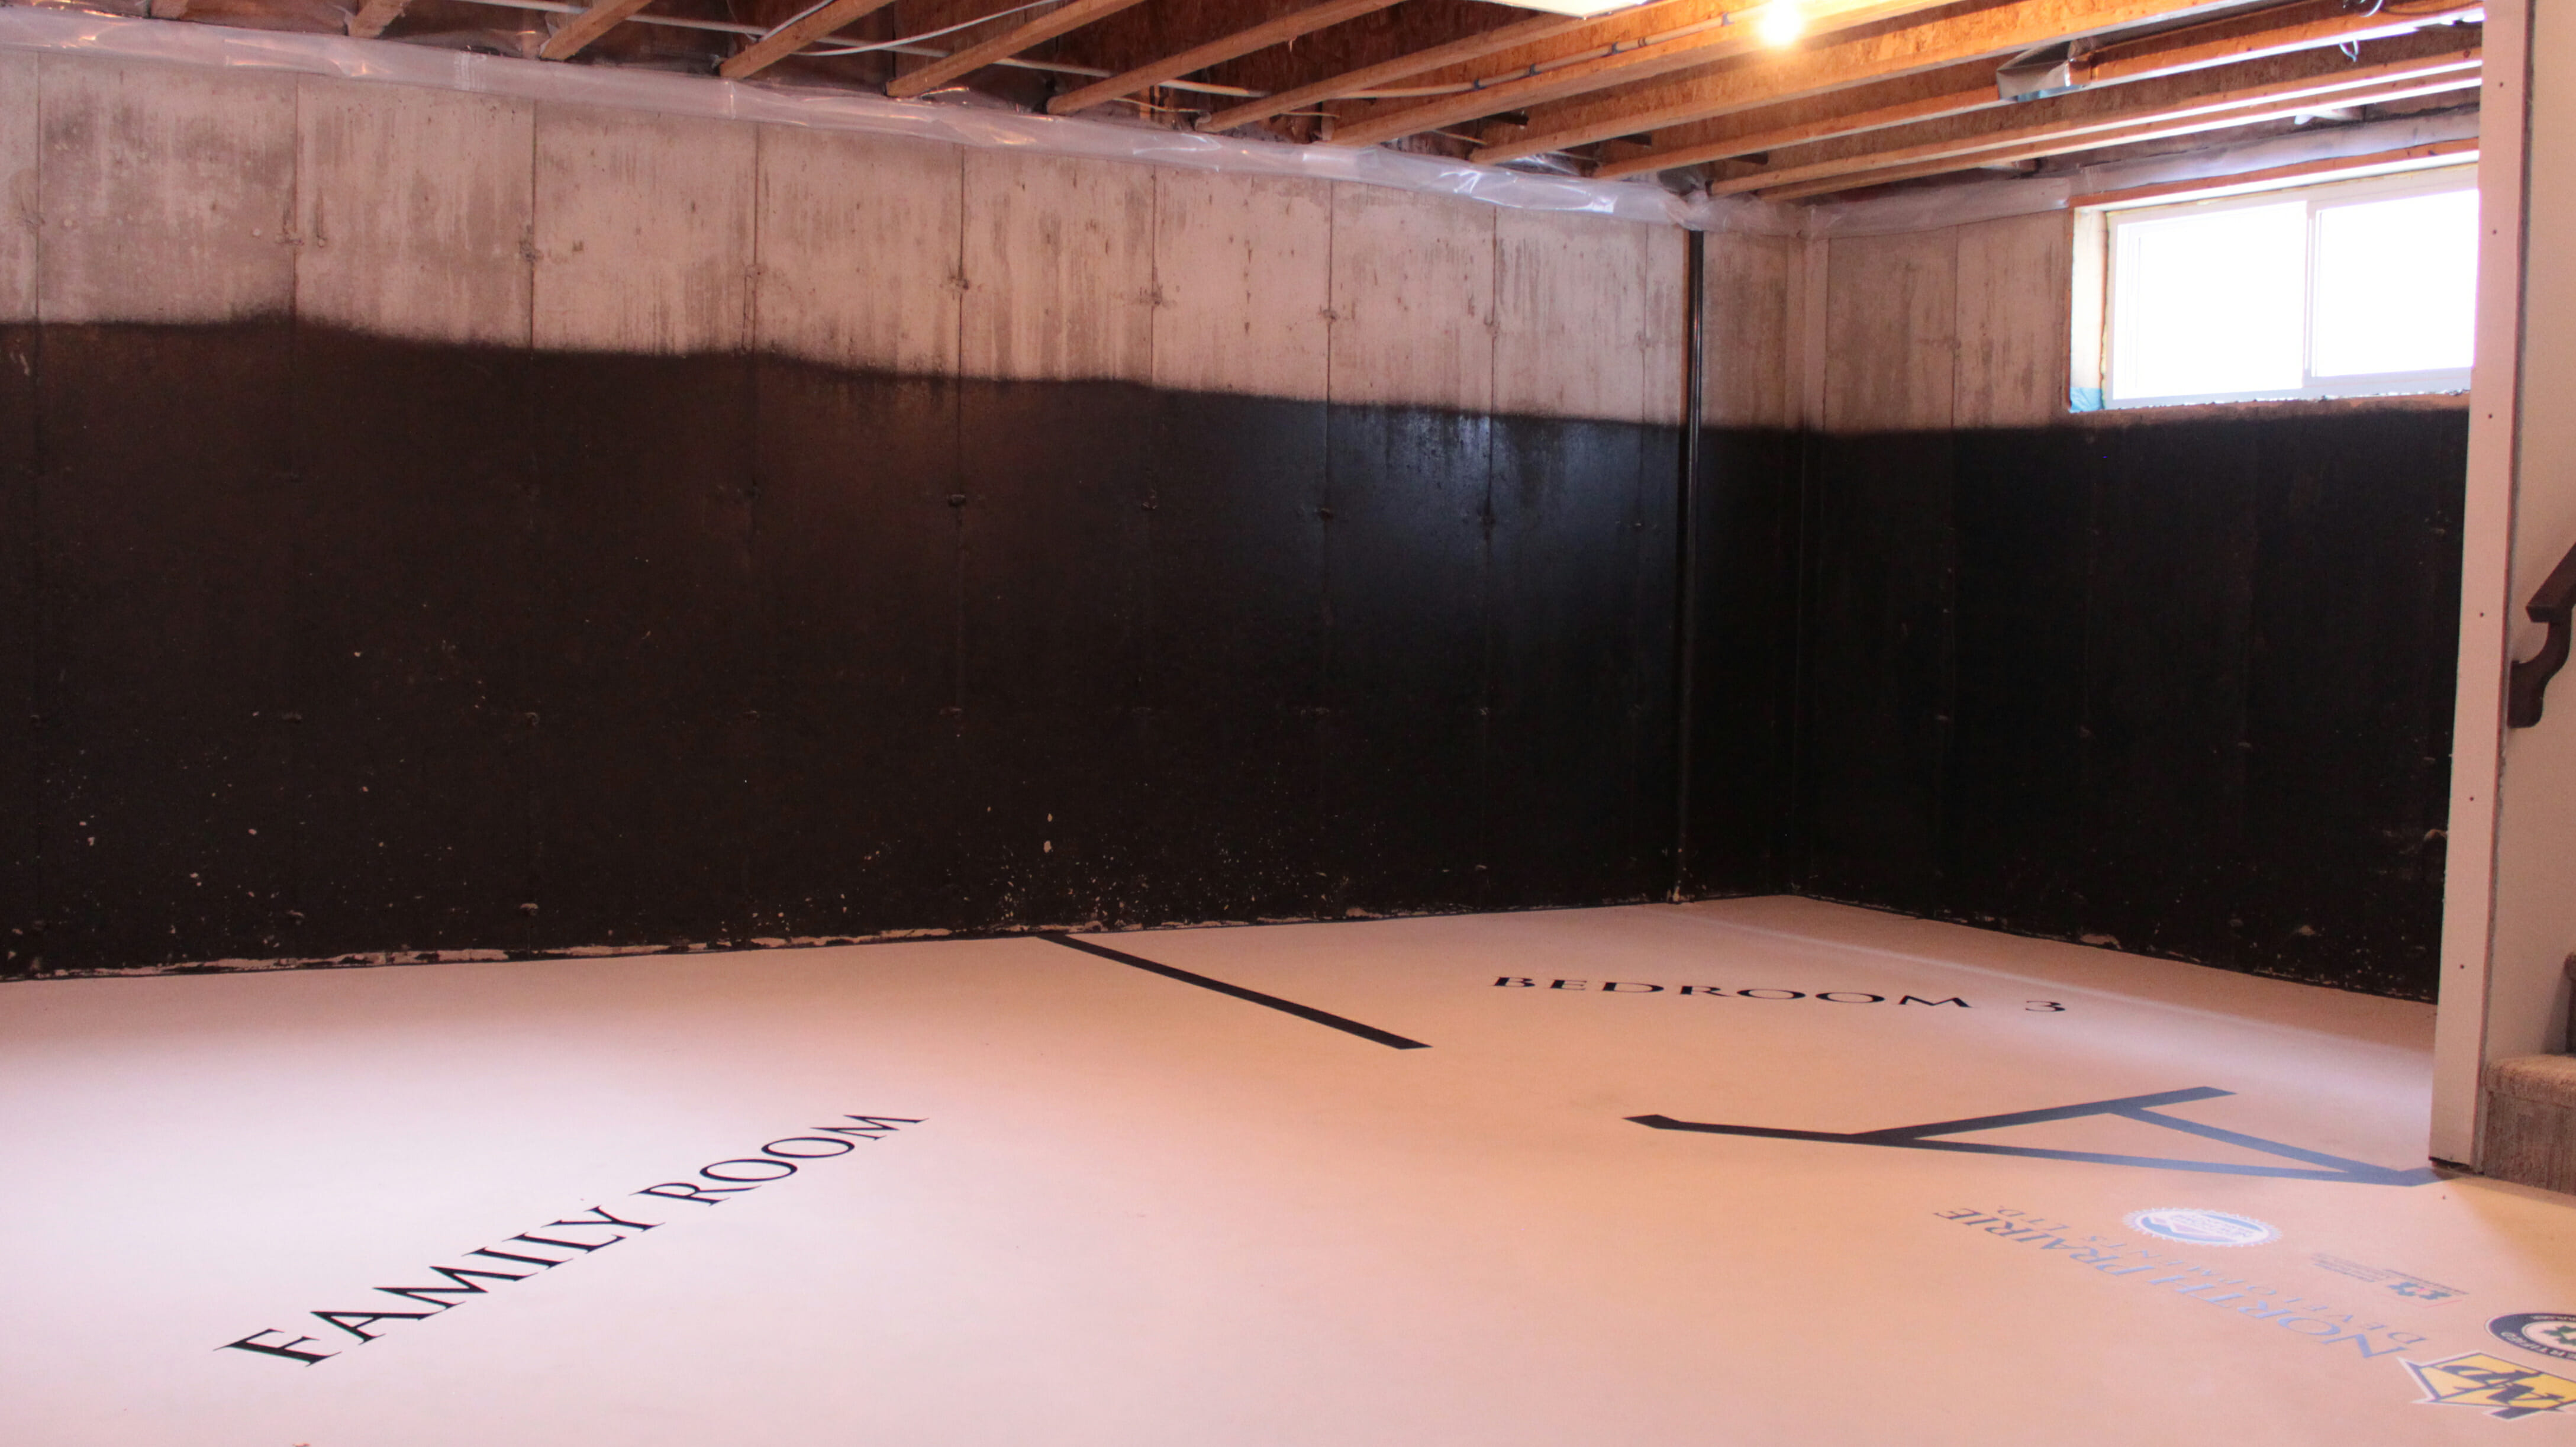
Q. The floors of my basement feel damp to the touch, is it safe to store items there?
A. Concrete basement floors sometimes feel damp to the touch. This usually happens for two reasons. First, during the first year after basement concrete is poured there is still water present in new concrete. This water evaporates to the inside of the basement and may result in floor that feels damp to the touch. Avoid placing materials such as carpet or boxes directly on the floor during the first year of owning the home.
Second, small voids in the concrete act like tiny straws that draw water from the soil into the basement slab. The rate of this movement depends on the amount of moisture under the slab, the relative humidity in the basement, and the porosity of the concrete. If the basement is very dry and the ground very wet, the movement of moisture will occur more quickly.
The movement of moisture through your basement floor slab can be stopped by breaking the connection between the source of moisture under the slab and the slab itself. If the dampness persists ensure water collected on the lot and on the roof is being directed away from the house by:
- Making sure downspouts are in place, extensions are down and water is being directed away from your home’s foundation.
- Check to see if the earth around the home has settled. If there is a depression near your home, remove the topsoil and fill this area with clay (not topsoil) so that there is at least a 5% slope away from your house.
- Make sure your window wells are not accumulating water.
- Use a dehumidifier or increase the amount of ventilation to the area where moisture appears to be collecting.
- Check to see if your sump pump is working properly.
For more information on this topic, search the New Home Warranty Care & Maintenance Manual, Click Here.

Concrete Floors
Q. I have noticed hairline cracks appearing in my garage floor, should I be alarmed?
A. It is common for moderate cracking to occur in a concrete garage slab floor as the concrete cures. There may be contraction joints cut into your slab to help control this cracking. Hairline cracks on a garage floor slab do not prevent the floor slab from performing its function and cracks are only covered under warranty if they are in excess of 9.5mm in width or vertical displacement.
Once the garage floor has fully cured, it is extremely important that you treat it with a concrete sealer to help protect it and prevent staining. Concrete paints and stains made specifically for concrete surfaces are available. It is also important to note that a painted or stained concrete floor may be somewhat slipperier than one that is not stained or painted.
Do not be alarmed if you notice white powder on areas of the concrete floor, as it is salts in the concrete mix, which are being carried to the surface as part of the curing process. These deposits do not affect the strength of the concrete floor.
Q. Are concrete cracks in my driveway or walkway covered under warranty?
A. Concrete by nature is prone to minor cracks and is considered a common occurrence. Minor cracking is totally normal and should be expected due to shrinkage, settlement, expansion and contraction of the concrete. Control joints are placed in concrete to help control cracks and provide an area for them to occur. It is recommended to fill cracks with a flexible concrete sealant based on the manufacturer’s recommendations, this is the homeowners responsibility and maintenance.
Did you know? There is no warranty coverage under the New Home Warranty Program for concrete patios, concrete sidewalks or driveways – Click here for your warranty coverage information.
Q. My driveway/sidewalk has heaved or settled and I am wondering what the cause of this is and if it’s covered under my New Home Warranty?
A. Seasonal temperature changes and precipitation variations may cause cracks in walks and driveways. Frost penetration may cause concrete walkways and driveways to experience heaving or settling in the direction of surface drainage. Affected areas usually return to their original position in warm weather. In most instances, these issues are beyond the builder and homeowner’s control and not covered under warranty.
For more information on this topic, search the New Home Warranty Care & Maintenance manual, Click here.
Doors, Windows & Condensation on Windows
Q. I think that my windows are leaking, I have moisture and frost build up on the glass, what should I do?
A. People often confuse condensation for leaky windows. The easiest way to tell the difference is if the moisture is between the panes of glass, there may be a fault with the window itself and it’s time to call North Prairie to arrange a service call, but if the moisture is on the interior side of the windowpane, the issue is being caused by condensation and a humidity issue inside the house. Condensation occurs when water vapour in the air contacts cool surfaces such as window glass.
Condensation on interior window surfaces is common during cold seasons and when outdoor temperatures are well below freezing, even ice may form at the bottom of the window. When this ice melts, the water droplets will collect on the windowsill and can stain or damage the finish over time, so it is important to wipe the water up as soon as possible.
Indoor humidity levels may be controlled by dehumidification, ventilation or air conditioning. Interior air moving over the windows can help control condensation, so for that reason, it is important to keep heavy draperies and window coverings open during the day, and ensure heat registers are not blocked to help promote airflow. Running the furnace fan continuously can also help to control condensation on windows and if your home is equipped with an HRV system, ensure it is running properly.
Did you know? As a homeowner, it is essential to understand and control the humidity in your home to prevent health issues and also damage to furniture and flooring. Please watch our web clip below on HRV Settings and Troubleshooting to get a better understanding on controlling humidity levels in your home.
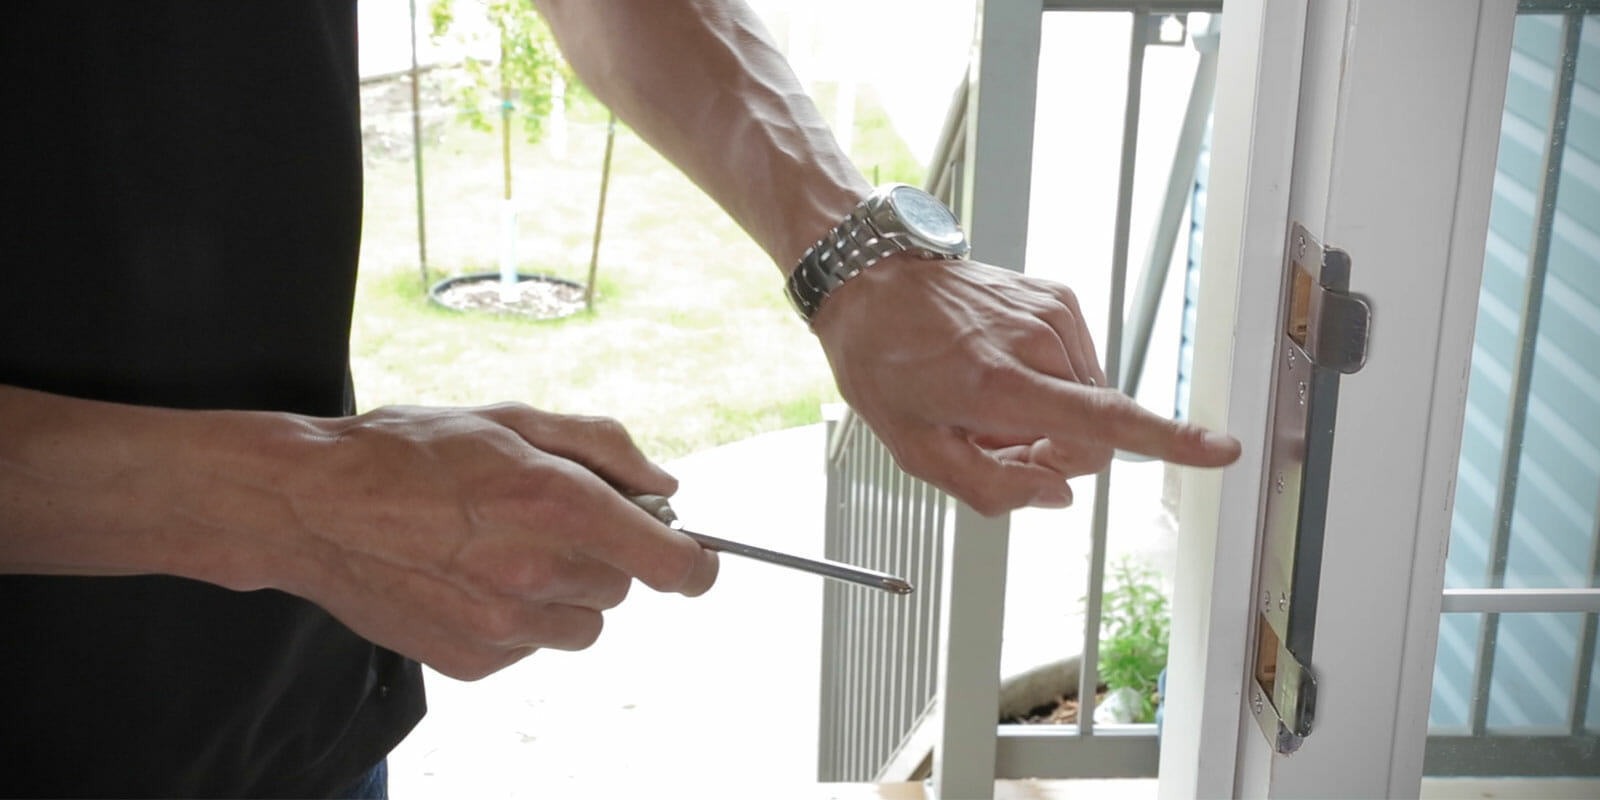
Q. My locks are freezing up in the winter. What is the cause and how do I prevent this?
A. It is very common for exterior door locks to freeze up for the first few winters, as there is a great deal of added moisture in the home caused by the building materials drying out. We would strongly suggest to keep some lock de-icer in your mailbox or leave on your front step to ensure it’s always on hand on those cold winter days. Moisture in your lock is also a sign you need to reduce the humidity in your home.
Q. My interior doors are now sticking in the frames and are harder to open, what should I do?
A. Interior wood doors and trim may swell in the summer and shrink in the winter as they adjust to the varying dry and humid conditions outside and inside the house. It is advised that you do not cut down or shave interior doors for this reason, but wait until the end of the year of occupancy and request that North Prairie inspect and adjust if required.
Did you know? The use a petroleum jelly or silicone lubricant on weather-stripping and window tracks will help with keep doors and windows operating smoothly. As well, all weep holes in the bottom track and frame of windows & doors must be kept clean to allow proper water drainage.
For information on general maintenance and operating instructions for your doors & windows, please watch the web clip below or view the instructional PDF.
Drywall Cracks & Nail Pops
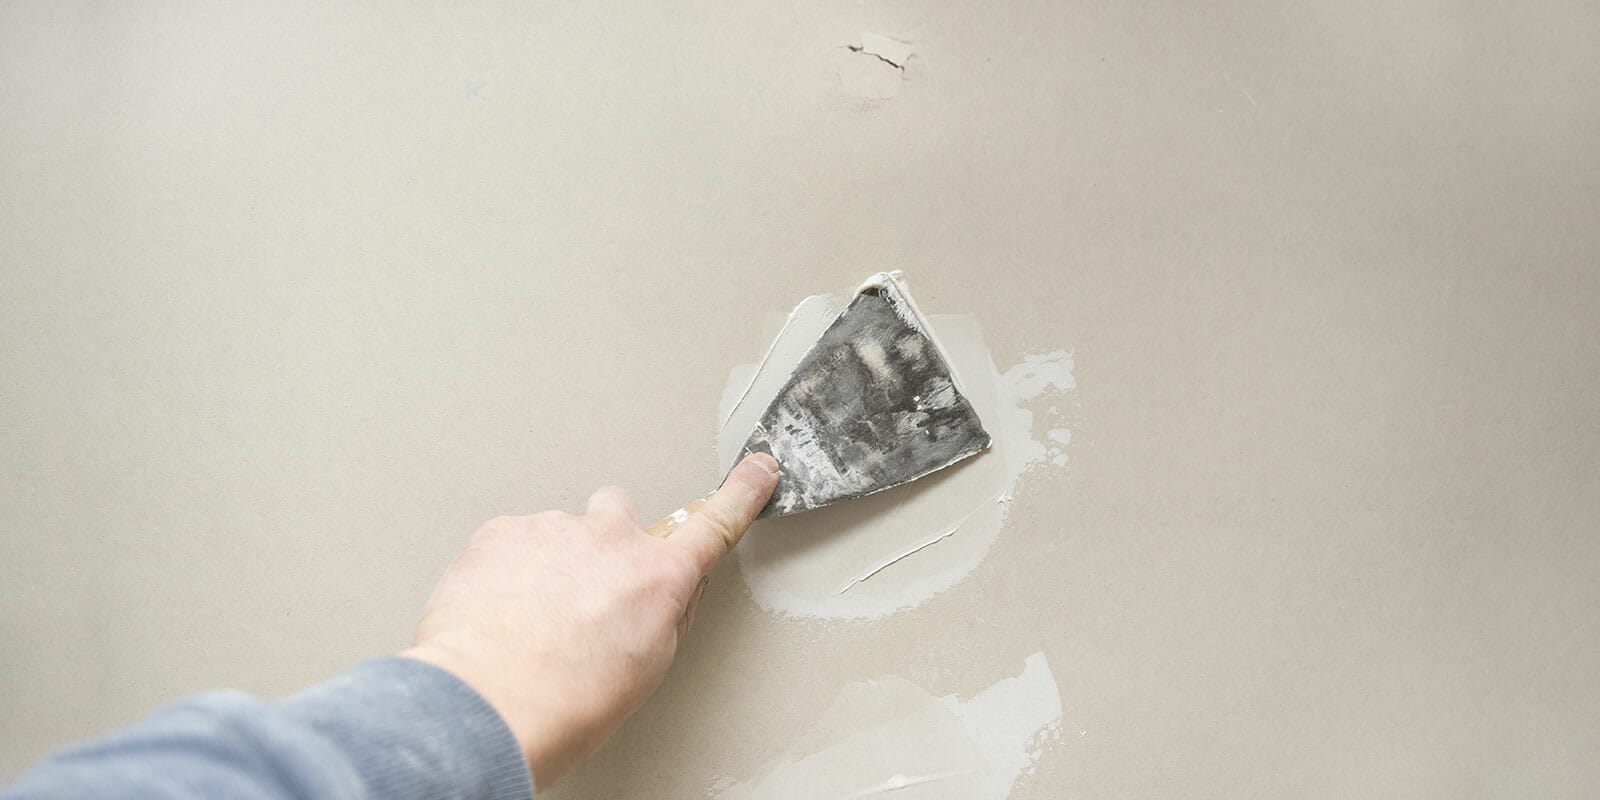
Q. Are cracks, gaps or nail pops caused by the settlement of my home covered under my warranty?
A. Minor drywall cracks, corner-bead cracks, nail pops and cracking on interior walls and ceilings are caused by home settlement and drying of wood framing materials. North Prairie offers a one-time repair of any drywall settlement and nail pops which will be carried out at the year-end warranty visit.
Did you know? If you wish to have truss uplift or drywall settlement repaired in your home; it is then your responsibility to paint these areas after the repairs have been carried out.
Please click here for New Home Warranty coverage information on this topic.
For more information on drywall cracking, settlement and what to expect over the first year, please watch our web clip below.
Electrical
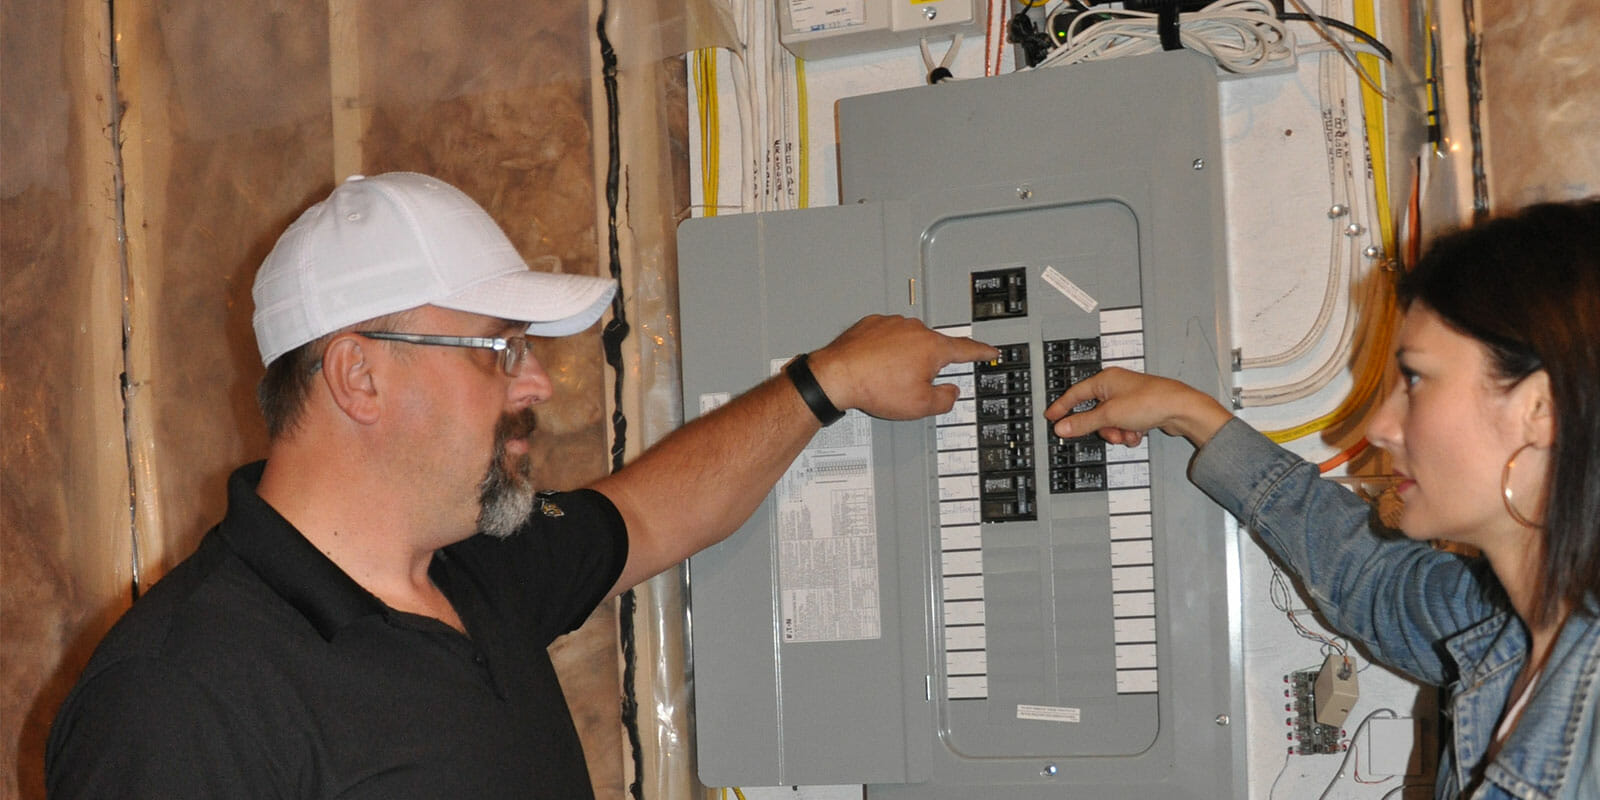
Q. Why is one or several of my interior or exterior outlets not working?
A. Your home is equipped with circuit breakers (located at the main electrical panel in the basement) to prevent damage to the wiring during an overload. The most common cause of an overload is having too many items plugged into a single circuit.
- To reset a tripped breaker – Locate the breaker of the tripped circuit, it will be the one that is set between the on and off position. Flip the breaker completely to the off position and then flip it to the on position.
- Your home is also equipped with GFCI or GFI circuits that are located near a water source such as in bathrooms, kitchens, laundry rooms, garages, and on the exterior of the home. Each circuit will have at least one outlet with a test breaker that serves all the outlets on that circuit.
- To test, press the T or test button, there should be a click as the circuit trips off.
- To reset, press the R or reset button until another click is heard. When a GFCI circuit has tripped, it can most often be reset at one of these outlets. If the outlet was not tripped, check the circuit breaker in the main electrical panel.
For our easy to follow steps on resetting your outlets quickly, please watch our web clip below.

Floors
Q. Why does my laminate or hardwood floor sometimes make a creaking noise when I walk on it?
A. Much like any wood product used in the construction of your new home, the laminate or hardwood flooring will expand and contract according to the humidity level in your home. Controlling humidity levels according to the flooring manufacturer’s recommendations will help control the dimensional stability of the floor and will ensure that your flooring will then be covered under your warranty.
Q. Why does it feel like my laminate moves slightly when I walk?
A. Laminate floors are installed in such a way to allow for expansion and contraction and this is referred to as “floating floors”. Sometimes a deflection can be felt when walking across the floor, but this is completely normal.
Q. My flooring is cracking/lifting at some of the edges/or forming gaps between the boards. What is causing this and what shall I do?
A. Laminate and hardwood flooring is highly susceptible to changes in indoor humidity. The first two years are especially critical for your flooring, while the wood normalizes to climate conditions. Flooring manufacturers generally recommend a relative humidity settings of 35-45 % year-round to minimize swelling and gapping; however, this can sometimes be unrealistic in our Saskatchewan winters without experiencing condensation on exterior components of the home (i.e., windows). The amount of humidity maintained in your home must be balanced to provide your family with comfort, minimize condensation as well as maintain your wood flooring. Excess humidity must be controlled through reduction and ventilation, while excessively dry conditions must be addressed by adding humidity to the home.
- There is no warranty on swelled or gapping boards caused by humidity issues. As well, the warranty does not cover indentations, scratches, water damage or any other damage due to improper maintenance. For that reason, it’s essential that you monitor and prevent any humidity issues from occurring as well as follow the manufacturers cleaning recommendations.
- During humid summer conditions, we recommend using a dehumidifier in the basement. This will help protect your wood flooring from expansion or warping due to absorbing excessive moisture.
- During the dry winter (heating) months, it is recommended that a humidifier system be used. As well as protecting the health of your family, a humidifier system will provide moisture in the air to help eliminate wood floorboard shrinkage.
For more information on this topic, search the New Home Warranty Care & Maintenance Manual, Click here.
Furnace
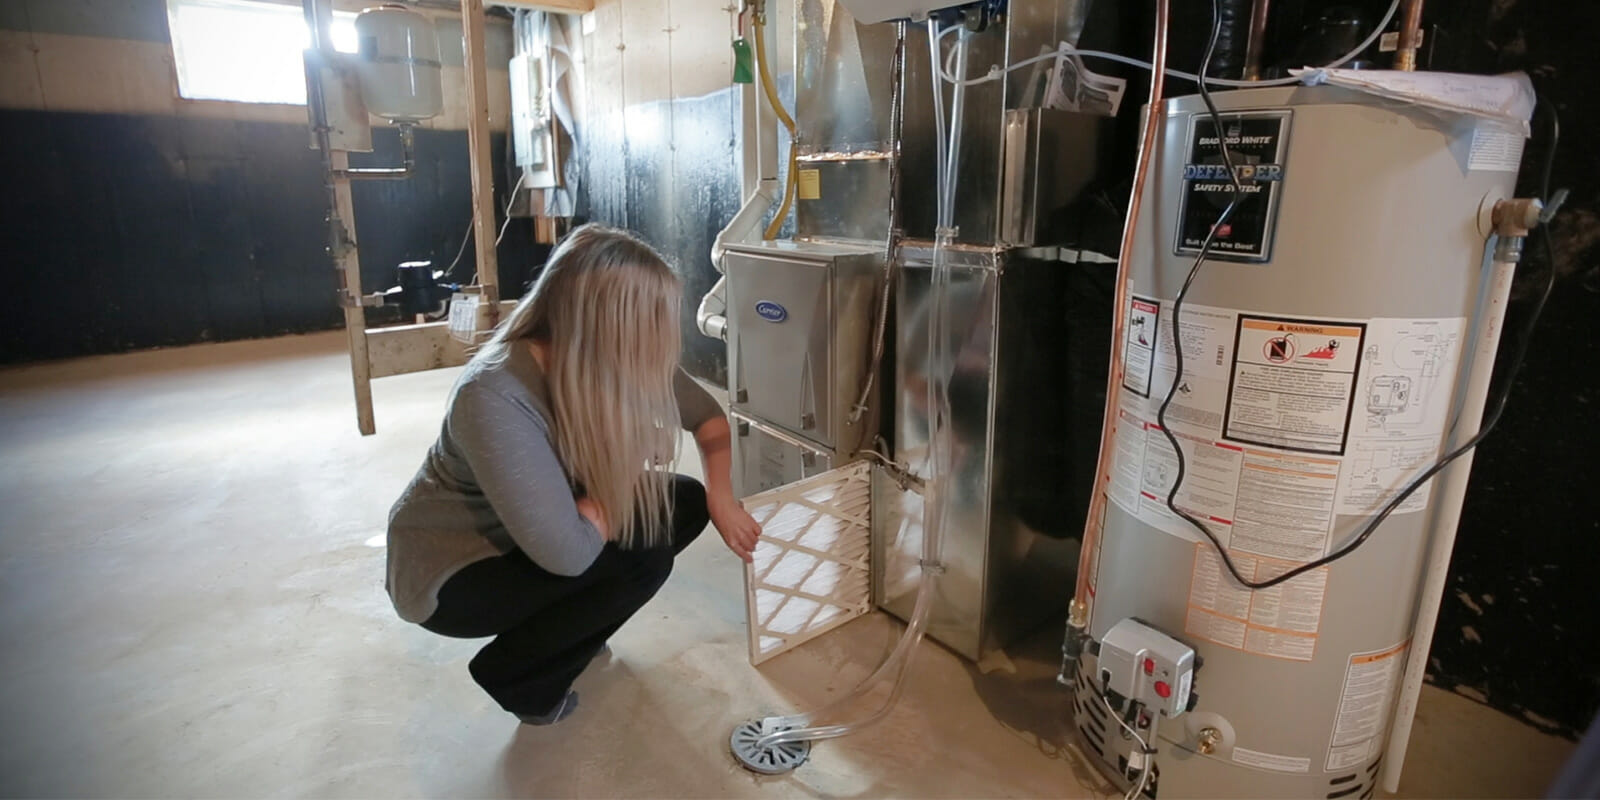
Q. How do I change the filter on my furnace?
A. Watch our easy to follow web clip for details on how to change your furnace filter correctly.
Q. My furnace is not running, what should I do?
A. Before you call for service, read through the troubleshooting steps on the below PDF or watch our short web clip, as it’s often a really simple fix.
Furnace Troubleshooting Steps:
- Firstly check your furnace filter to ensure it is not plugged. Your furnace filter needs to be changed once a month for the first 6 months and then at least once every 1-2 months, after that. (For details of how to change your furnace filter, watch our web clip). After you have replaced the filter, turn the unit off for 5 minutes and then turn it back on to reset the system – the red power switch is usually located at the top or bottom of the basement stairs or near the furnace itself.
- Make sure the furnace is powered on. Depending on the model installed in your home, there is either an amber light on the front door of your furnace or you may have to remove the front panel to see this light. If there is no light on, check that your furnace wall switch is powered on (this is a red or white switch with the words “Furnace and Emergency” on it – this is usually located near the stairs to the basement at the top or bottom. If the amber light is flashing, the flashing will create a code that will help diagnose what is wrong with the furnace. Write this code down before calling for service.
- Check the thermostat control upstairs to ensure it is set to the HEAT position and is set above the current room temperature. For example, if the current temperature at your house is 21°c and the heat control is set at 20°c then it will not be calling for heating until the temperature drops below 20°c
- Check your electrical panel to ensure the circuit breaker has not been tripped. The breaker should be in the ON position.
Q. Why is my furnace fan running constantly?
A. Your furnace fan is electronically locked to your HRV unit so anytime that you are running your HRV unit at the minimum or maximum setting then your furnace fan will also run the whole time 24 / 7.
If however, your HRV unit is set on intermittent, and the furnace fan is running constantly, then it is most likely that either your furnace filter needs to be changed or the HRV filters need to be cleaned.
Did you know? The most common problem with furnaces not working is due to plugged furnace filters, you will need to change your furnace filter once a month for at least the first 6 months in a new home and then every 1-2 months after that. Set a reminder in your phone to change your furnace filter and also clean out your HRV filters at the same time.
Garage Doors
Q. My garage door will not close properly, it goes down 6 – 12 inches then reverses and the lights flash. What should I do?
A. The cause of this issue is that your photo eye sensors are blocked or not lined up properly.
You will need to locate the two sensors on the door tracks which are located 4 – 8” from the floor and ensure that there are no obstructions preventing them from seeing each other clearly. If there is nothing in the way then check that they are lined up. One sensor should have an orange light that shows that the eyes have power and should always be lit up. The other eye has a green light that shows alignment. Ensure that the green light is lit up brightly and not flickering. If the green light is not on steady, adjust the sensor in the bracket until the light comes on and remains on.
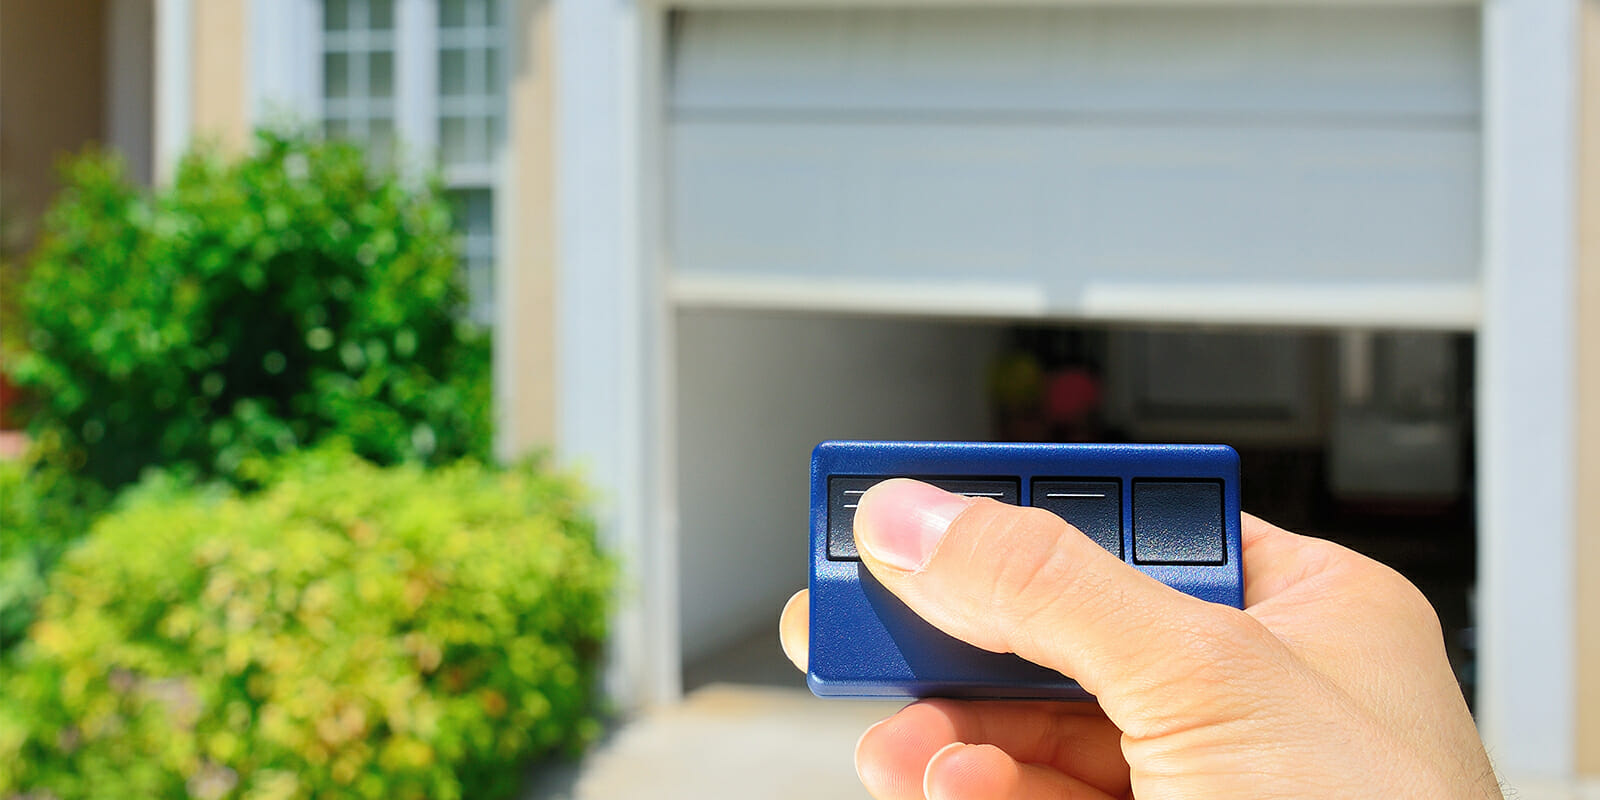
Q. Why is my garage door opening and closing by itself or why does my neighbours control open my door and how do I fix it?
A. This is a common problem and just means that during the programming of your door, a nearby remote was accidentally programmed. To correct this issue the remote memory needs to be erased and the remotes must be reprogrammed as follows:
- Locate the learn button on the operator unit on the ceiling. The button is approximately ½” x ½” and is located on the back of the unit, or inside one of the light covers.
- To erase the programming, press and hold the learn button. An LED should light up once the button is pressed. Hold the button till the light shuts off, then release.
- To reprogram the remotes, press and immediately release the Learn button then press the button on the remote you wish to use. Repeat this step for each individual remote.
- Locate the learn button on the operator.
- Press and release the Learn button, and then step away from the operator.
- Press the button on the remote you wish to use.
Q. My remote has a very limited range or does not always open my garage door?
A. This is caused by the remote being too close to the receiver during programming.
- Locate the learn button on the operator.
- Press and release the Learn button, and then step away from the operator.
- Press the button on the remote you wish to use.

House Settlement – The 1st Year, What to Expect
Q. What is causing the gaps that have appeared between my countertops and the wall and also my baseboards joints?
A. Examples of the normal effects that humidity and shrinkage have on your home are as follows and are not something to worry about:
- Thin cracks in exposed wood structural supports (i.e.joints and beams).
- Small gaps between countertops, cabinets, vanities and the wall.
- Minor joint openings in door and window trim, baseboards, walls, etc.
- Slight separation between fireplace mantels and the walls or joints.
- Small gaps between individual pieces of wood flooring.
- Openings between wood flooring and wall baseboards, door jams and trim.
- Squeaks in the underlay of your flooring and stair treads.
- Small gaps between stairs and stair mouldings and the wall.
- Gaps between ceiling and walls in homes that have trusses instead of attic rafters and joists.
Q. What is truss uplift and how does it affect my home?
A. Homes built since the 1970s are not typically built with attic rafters and joists, but trusses. The ceiling of your home is attached to the lower chords of these wooden trusses, which tend to shrink and expand seasonally when temperatures and humidity changes.
During colder months, you may notice the effects of these truss movements when a slight gap appears between the interior walls of your home and the ceilings. As the trusses expand and contract, the ceiling can lift slightly off of the walls of your home. The ceiling will then drop back into place during the warmer summer months. This is completely normal.
Q. Are the cracks and gaps caused by the settlement of my home covered under my warranty?
A. Minor drywall cracks, corner-bead cracks, and nail pops and cracking on interior walls and ceilings are caused by home settlement and drying of wood framing materials. North Prairie offers a one-time repair of any drywall settlement and nail pops which will be carried out at the year-end warranty inspection. Please note if as a homeowner you wish to have truss uplift or drywall settlement repaired; it is then your responsibility to paint these areas after the repairs have been carried out.
Please click here for New Home Warranty coverage information on this topic.
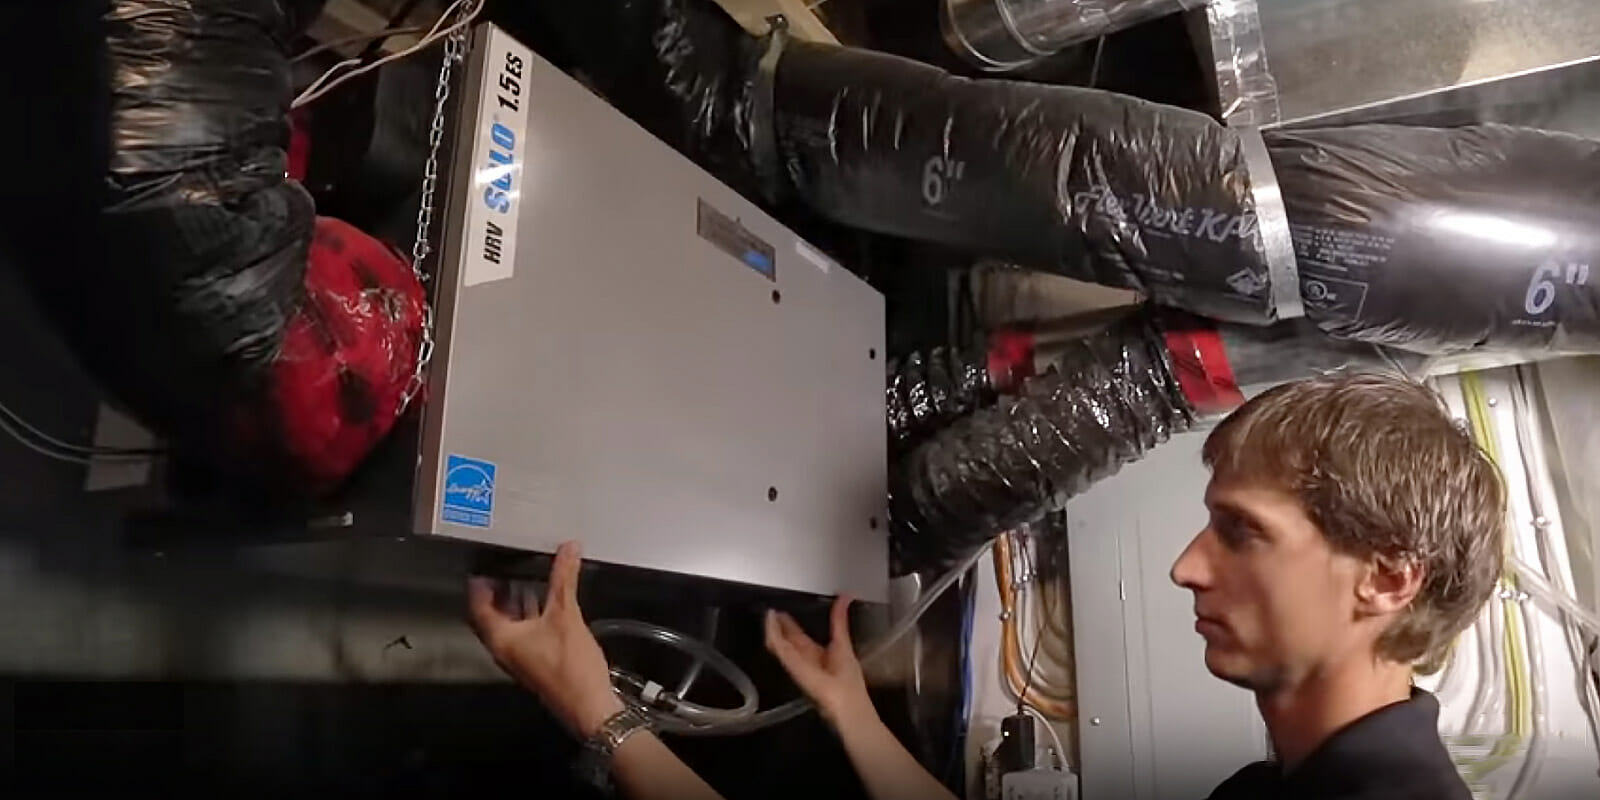
HRV – Heat Recovery Ventilation System
Q. What is my HRV system for?
A. Your HRV system exhausts the warm humid air from your home and exchanges it with fresh drier air from the outside. The HRV core warms the incoming air before it is distributed throughout your home. It’s important you understand how the HRV system works to control humidity in your home as it is essential for good health and prevents damage to furniture and flooring. Watch our web clip below for more information on this topic.
Did you know? We recommend all homeowners purchase an inexpensive hygrometer to monitor the humidity levels in the home. These can be purchased online or at a local building supply store.
Q. What setting should I run my HRV control unit at?
A. For all new homes; we recommend that you set your HRV control at the intermittent auto setting which is 20 minutes on / 40 minutes off. Your HRV system can be shut off during the summer and warmer weather when you’re running your air conditioner.
Anytime one of the timer buttons is pushed (in the bathroom or kitchen) – the HRV will jump up to high speed for that period of time-pressed on the button – e.g. when you take a shower and press the button for 20 minutes. After this period it will then return to the intermittent cycle.
We recommend that you only use the minimum or maximum settings on your HRV control temporarily to fix a problem or address a situation and then go straight back to the intermittent auto setting.
On Minimum Cycle – your HRV will exchange fresh air with the outside continuously (24/7) at low speed. When an exhaust button is pushed in a bathroom or kitchen this will increase to high speed for the set time and then fall back to low speed.
An example of when you would set your unit to this would be if you were entertaining and had a house full of people and it felt stuffy. This setting gives continuous air exchange and fresh air.
On Maximum Cycle – your HRV will exchange fresh air with the outside continuously (24/7) at high speed.
An example of when you would set your unit to maximum would be if you were cooking and had excessive humidity or food odours or smoke that you wanted to expel.
Q. My HRV system is set at intermittent auto setting and isn’t turning on, what should I do?
- Check that the filters are not plugged (watch our web clip for information on how to clean your HRV filters).
- Check that your hood outside is not blocked as sometimes frost or even a plastic bag can prevent air from entering or leaving the home and cause issues with your HRV system.
Q. Why is my HRV system running constantly when it is set on intermittent?
A. It could be that the HRV manual override button, which is located on the left side of the actual unit in your basement, may have been turned on accidentally. If there is a green or amber light on the left-hand side of the unit, keep pressing the button until there is no light on. This switch is the manual override button that is used for a technician to be able to service or work on your unit and should always be switched off.
Q. What is a humidifier unit and what is it used for?
A. While your HRV system removes humidity from your home, a humidifier adds humidity. As cold temperatures set in, humidity levels in the air will drop. Cold air is unable to hold as much moisture as warm air. Because of this, when you heat your home the relative humidity levels can drop to as low as 10%. This can lead to drier skin, as well as nose and throat discomfort. It can also cause static electricity, and dry your furniture and flooring out. A comfortable humidity level is usually between 35 – 45 %.
Please note that during the extreme cold weather like we experience in Saskatchewan, a humidity level below 30% may be required on some days to minimize condensation issues in your home.
Q. We have woken up and have moisture on our windows and on door locks, what should we do?
A. The most common cause is that you may have forgotten to turn down the humidifier or need to adjust it to align with the outside temperature. Take a look at the setting on the control panel above the humidifier and turn down the setting until the weather warms back up again. It may also mean that you need to run your HRV system on a higher setting for a day or two to fix the humidity issue in your home.
Q. How do I maintain my HRV system?
- Every three months, open the door of the HRV and remove the 2 foam filters. Vacuum the filters to remove dust and then wash in lukewarm water with mild soap solution. Let them dry and reinstall with the arrows facing towards each other. This is recommended every 3 months but it is a good idea to check these filters when you are changing your furnace filter.
- Once a year, remove the core or heat exchange cell from the unit. Soak it for 3 hours in warm water and mild soap. Rinse with a strong stream of water. Let it dry and then reinstall it.
Landscaping, Settlement and Seasonal Work
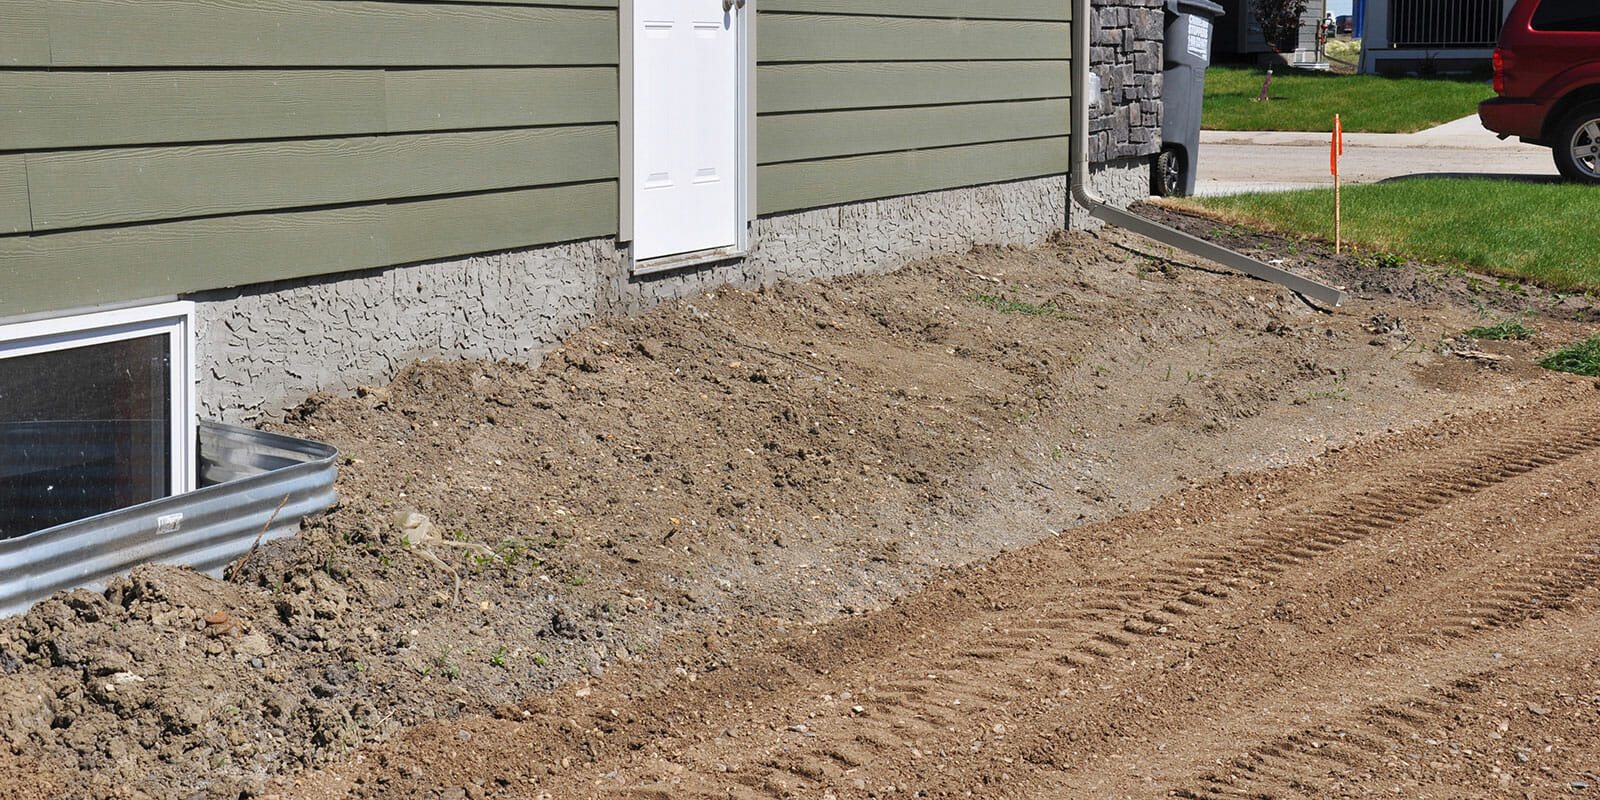
Q. What is grading?
A. Grading is a process carried out by the builder near the end of construction (weather permitting) where the exterior soil around your property is sloped away from the house to direct water (ie rainfall) away from the foundation. This should allow positive drainage of water away from the house and prevents problems such as water entering your basement.
Settlement may have occurred after grading has taken place causing depressions and uneven areas that may need to be filled by the homeowner before the application of topsoil and landscaping.
The Grade is finished usually 4” below the finish level to allow space for you to install your topsoil and landscaping. To prevent movement and washout of your grade, It is important for you to apply your topsoil and landscaping as soon as possible after the grade.
In spring, fall and during heavy rainfall, it is the homeowner’s responsibility to ensure that water is being directed away from the foundations of their house by checking that downspouts are down and directing water away and also that your sump pad is down and in place correctly. Click here to view more information on grading
For more information on this topic, please watch our web clip below on regular and seasonal maintenance or search the New Home Warranty Care & Maintenance manual. Click here
Q. We moved into our home in October, when can we expect our seasonal items to be carried out?
A. North Prairie cannot begin any seasonal work until all the frost is totally out of the ground. We generally schedule to carry out all grading, landscaping, concrete work etc. during the mid-June-Sept period(weather permitting). For efficiency purposes, this work is usually scheduled area by area instead of in the chronological order in which the houses were delivered. Please be patient as we move through your area.
Plumbing Leaks
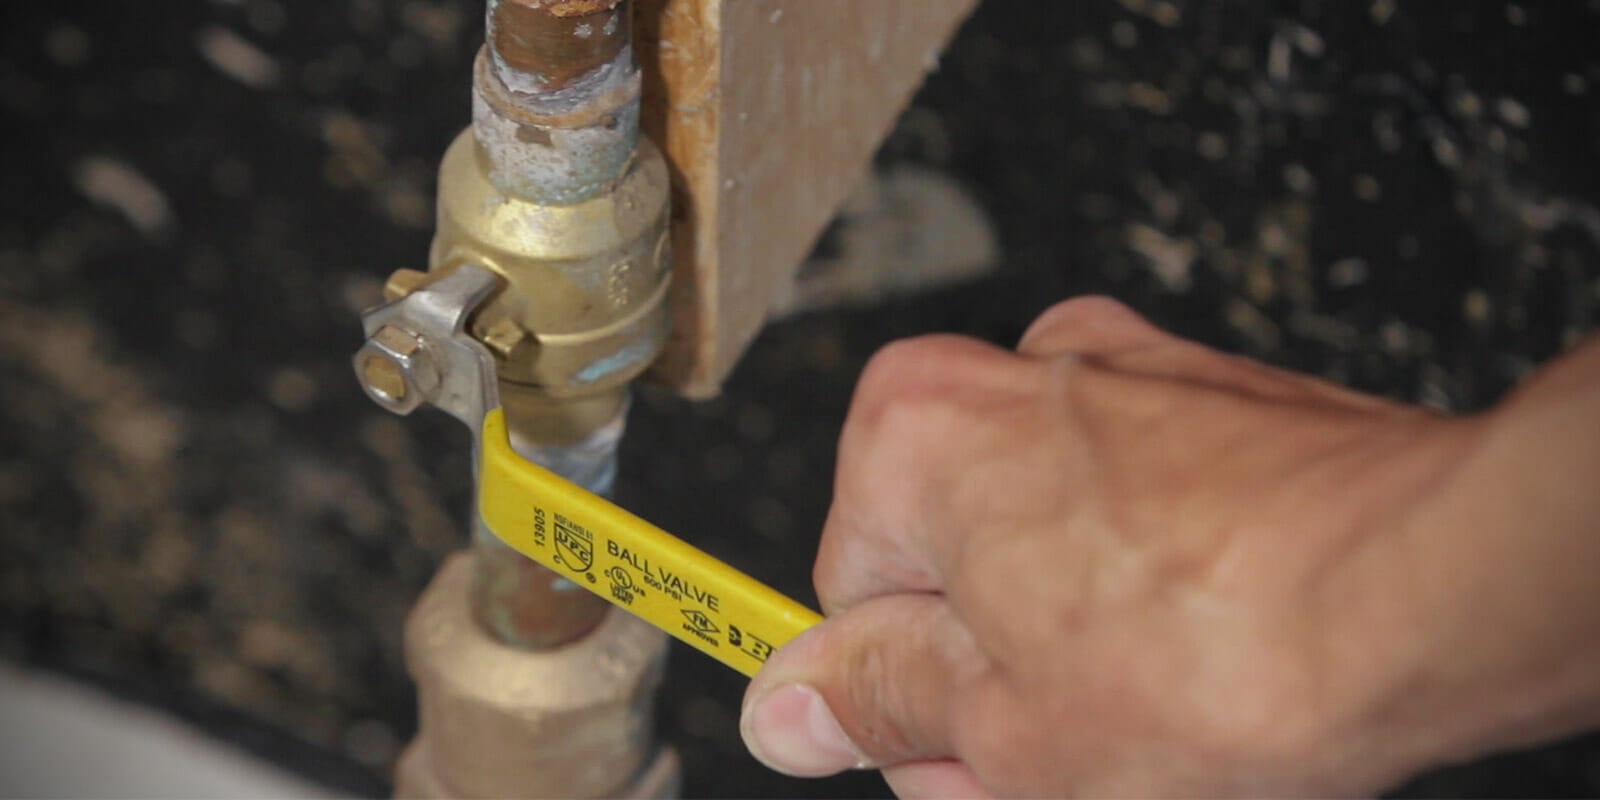
Q. What do I do in the event of a plumbing leak?
A. If a plumbing leak is discovered in your home, immediately shut off the water supply to the affected area. Individual shut off valves at the fixture will isolate that location and allow the rest of the plumbing system in the home to be used. If the leak cannot be isolated in this manner shut off the main water supply to the home which is located in the basement. If your home is still under warranty with North Prairie, notify our office immediately at 306-931-2880. If your home is no longer under warranty, call a licensed plumber to correct the issue.
For more information on this topic, search the New Home Warranty Care & Maintenance manual. Click here.
Smoke & Carbon Monoxide Detectors
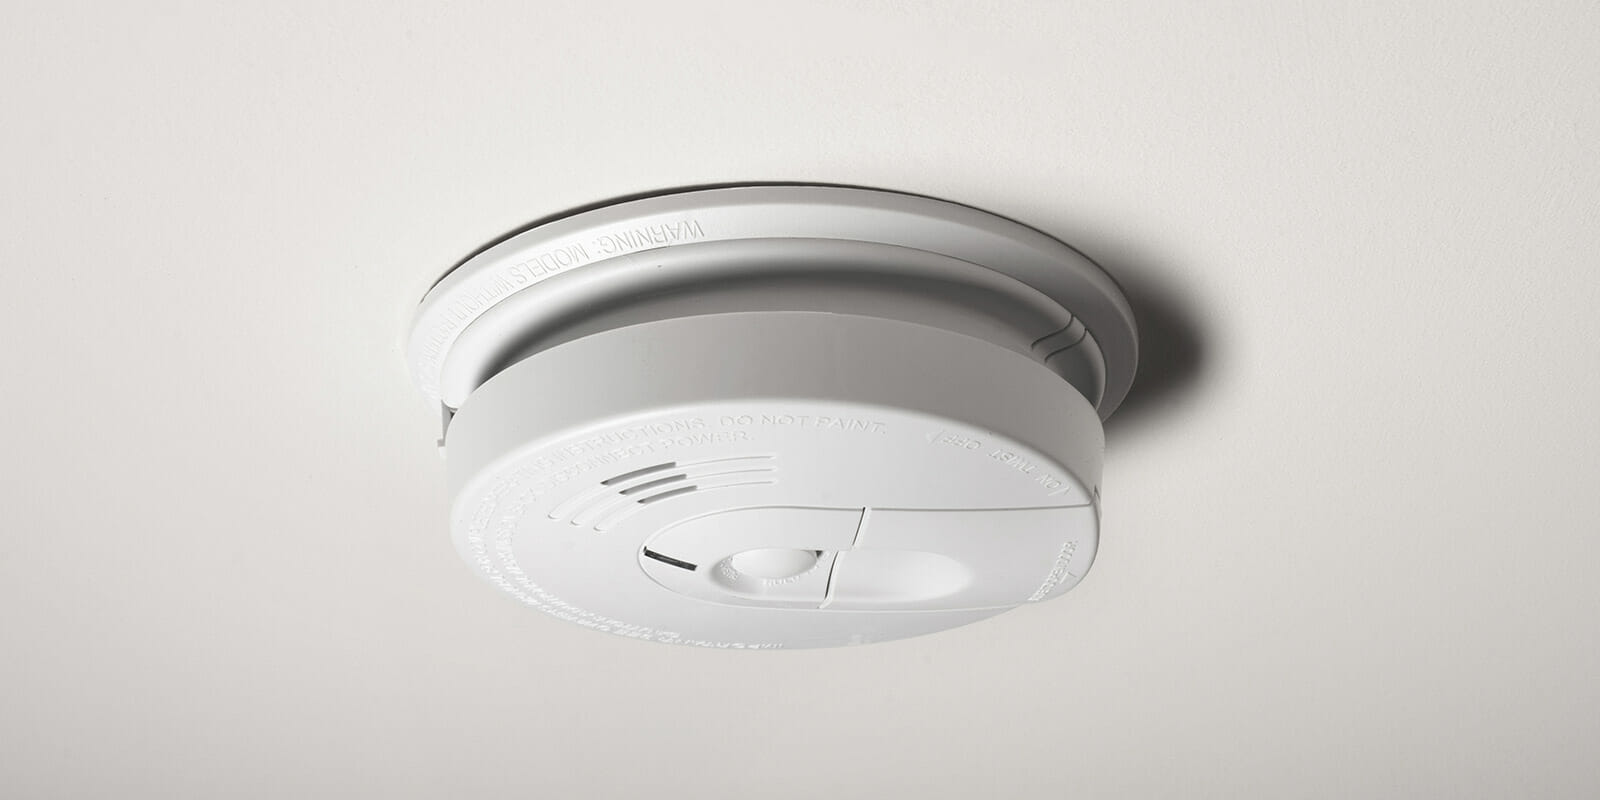
Q. Why is my smoke alarm beeping?
A. The majority of new homes built since 2013 have been fitted with an alarm that is hardwired to the electrical system of the house as well as having a 9Volt battery backup in case there is a power outage. The first thing to check if you have a beeping sound is to see if your alarm is the type that has a backup battery. You will find a small battery slot at the side of the alarm and by pushing this, the slot will open. You can then change this battery out and this should solve the problem.
If your alarm does not have a battery backup or you have changed the battery and the alarm is still beeping you can check the following:
- There may be a buildup of dust that needs to be removed from the detector. This can be cleaned by using a vacuum cleaner or a duster.
- The other cause may have been an interruption to the electrical current to the house and you may need to reset the main breaker to the house to correct the issue.
Did you know? Smoke and CO2 detectors should be tested periodically to ensure they are operating by pressing the “test” button on the face of the detector.

Snow & Ice on Concrete
Q. Can I use salt to melt snow and ice on the exterior concrete?
A. No. Salt and other de-icing chemicals will severely damage exterior concrete surfaces and cause pitting and scaling. Even the “safe salt” products that are on the market are not advisable, these chemicals will cause irreversible damage that is not covered under your New Home Warranty. These chemicals can be tracked in by your vehicle’s tires or accumulate in your vehicle’s undercarriage. Remove snow and ice promptly from concrete surfaces. If a thin layer of ice cannot be removed we recommend the use of sand or cat litter to provide safe traction.
Sump Pumps
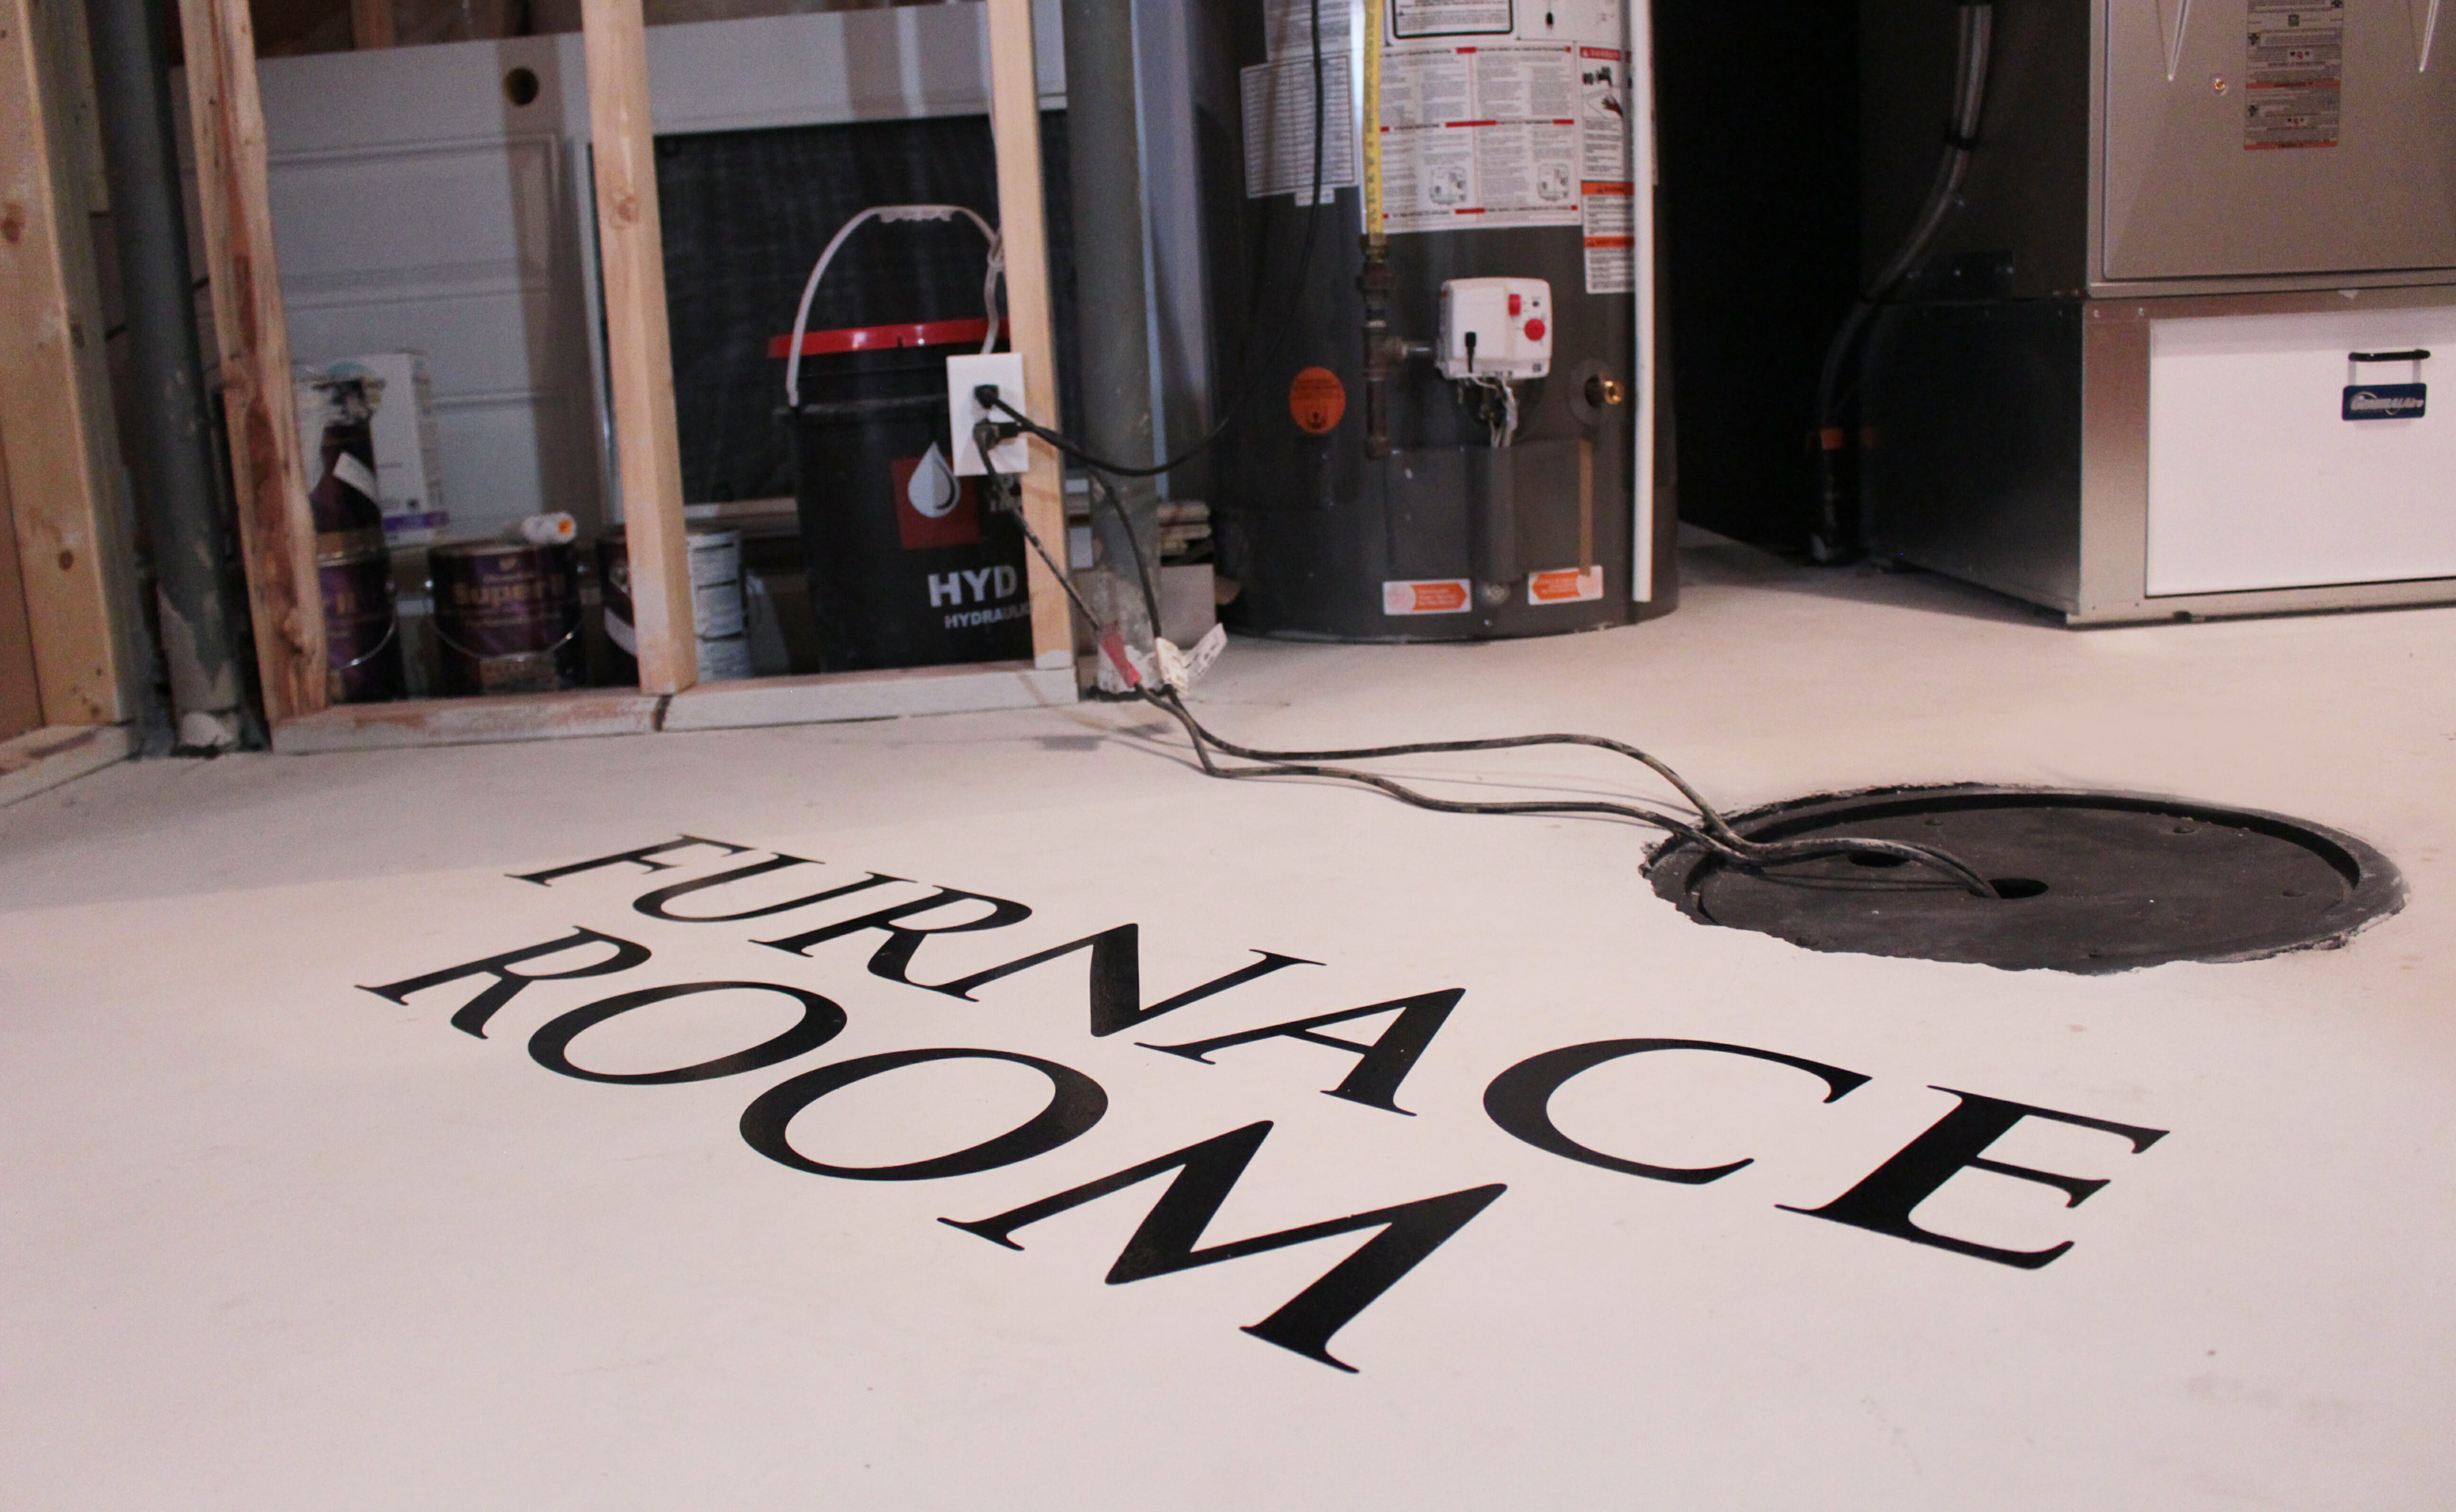
Q. What is a sump pump & why is it important to my home?
A. A sump pump is a small pump installed in the basement floor, typically located in the mechanical room. A sump pump works to keep the area around the concrete footings dry and to protect your basement from flooding. It is essential to check your sump pump in the spring and fall to ensure it is operating properly.
Please review the PDF below for more information on how to maintain and check your pump.

Warranty Service
Q. How do I request a warranty service?
A. All non-emergency warrantable service requests can be submitted by emailing [email protected] or by calling Danielle, our Customer Support Coordinator, at the office (306) 931-2880 during normal business hours of 8am – 5pm, Monday to Friday. You will then be contacted within two days to arrange a suitable day and time within the next 1-2 weeks depending on your schedule and the issue; to have the work completed by either North Prairie or one of our qualified contractors.
All service call-outs take place between 8am and 5pm Monday – Friday and if you cannot be there to meet our service technician, you can make arrangements to leave a key at our office or a prearranged location. For after-hours emergencies please call at (306) 931-2880 and press 3.
Q. What is considered an emergency?
A. An emergency situation is defined as: the total loss of heat between September 15th and May 15th, a gas leak, total loss of electricity in the house, total loss of water supply, plumbing leak that requires complete water shut-off, sewage back up, or water penetration of an interior.
Did you know? We recommend searching our home support tools and web clip section on our customer experience website, as you might find your concern has an easy solution.
Q. Can I schedule warranty service work on the weekends or evenings?
In an effort to provide the most cost-effective service to all of our customers and in accordance with the New Home Warranty Program of Saskatchewan, service requests must be scheduled during normal business hours Monday to Friday.
Q. I will not be home for the repairs. Can I leave a key for you?
A. If this arrangement suits you best, and you do not have the time to be there, you can make a prior arrangement with our customer support department about where we can collect a key and we will enter your home at the designated time and carry out the repairs.
Q. How do I know if something is covered by my warranty?
A. Please click here for more information on your New Home Warranty Program of Saskatchewan coverage.
Q. When does my warranty period start?
A. Your warranty period starts on the date that you take possession of your property.
Please watch our customer support introduction web clip to give you more information on our services and the online tools we have created to make your homeownership experience as enjoyable and carefree as possible.
Seasonal Maintenance Checklists
Seasonal Maintenance Checklists
Just like a car, your home needs regular care and maintenance and occasional tune-ups to stay in tip-top shape.
It is essential to carry out regular seasonal checks on your home to ensure all your equipment is working correctly and there are no issues that may cost you time and money if left unchecked. We all lead very busy lives, and it’s hard to remember everything – so why not set a reminder on your phone or mark your calendar to carry out these checks on the first day of each new season?
Simply select the season below to save or print the checklist:
Watch the Regular & Seasonal Home Maintaining Video!